For a quick overview of what Rules are, check out the following Knowledge Base.
First ensure you are at the scope in which you want the rule configuration to reside.
To create a rule, navigate to the left hand menu and select Rules from the list. Once you have that page open you can click the Create Rule button on the top to start the process. Then follow these steps.
First ensure you are at the scope in which you want the rule configuration to reside.
To create a rule, navigate to the left hand menu and select Rules from the list. Once you have that page open you can click the Create Rule button on the top to start the process. Then follow these steps.
- Give your rule a Name and a Description.
- This will ensure that you are able to easily identify them in the future, the more detail you put here the easier it will be later.
- Choose the Schedule for your Rule
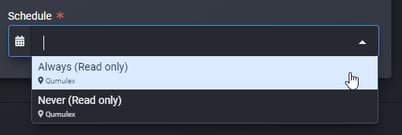
- QxControl comes with a "Never" and an "Always" schedule by default. You will also see any custom schedules you have already created in the Schedules section of QxControl previously. In many cases Always will be the proper choice.
- Next you will set your triggers. These define the combination of things that need to happen to execute your Action: Notification
- Adding a Trigger
- Click Add Condition
- Choose the What from the dropdown list. This can be any of the items listed:

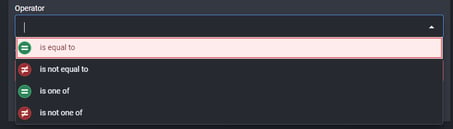
- Then choose the Operator from the list (most often "is equal to")
- FInally choose the value related to the choice under What. For example if you chose "Status" from the What menu, you might choose "Locked Down" for your Value. Meaning that this particular trigger is "When Status has the value of Locked Down".
- Choose the What from the dropdown list. This can be any of the items listed:
- Click Add Condition
- In some cases you may add more than one trigger. When you do this ALL trigger conditions must be met to execute the action.
- Example: I want an email when Cardholder Joe Smith swipes his card at the front door, is authenticated successfully.
- Person - is equal to - Joe Smith
- Door - is equal to - Front Door
- Status - is equal to - Authenticated
- Example: I want an email when Cardholder Joe Smith swipes his card at the front door, is authenticated successfully.
- The next step you may choose to add is a Guard. A guard will prevent the execution of the rules action if certain conditions occur within the timeframe given.
- For example if I wanted to have the above for Joe Smith, unless he badges out within 2 minutes, I could do this here by making the delay as 120 seconds and the condition for the user badging through the Out door.
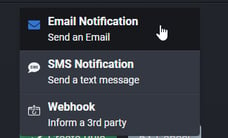
- Finally we want to add our Action. Actions are executed once the Rule is triggered based on the prior Rule configuration. Currently These are Notifications
- Choose one of the options within Add Action
- Once chosen you will be presented with configuration appropriate for the type of Action you have chosen.
- For Example Email. When you choose this you will be able to add one or more email addresses to the notifications list. If the person is added already to the People section of QxControl with an email, it will autodropdown when you begin typing. Otherwise you can simply type the entire name out and click on the confirmation result.
- Then you will define a Subject and a Body for the email. This can be completely free form, or you can use the Add Data button to insert dynamic data. These are segments of data that the software fills in automatically based on the state of the system at the time of the event.
- Example: Camera Name, Time, Place, etc.
- Once that is set you can create a Rate Limit Overried if you would like. This will prevent the action from occurring more than once durign the duration specified. By defualt the value is 60 seconds
- Finally select Update on this section.
- Choose one of the options within Add Action
- The final step is to click Create Rule at the bottom of the page.