This Article assumes the following:
The Axis A1601 / A1001 has been assigned an IP address and User and Password for an Administrator level Account.
Door Access Schedules have been created.
Door Access Areas have been created.
The Aperio Hub is wired and connected to the Axis Panel.
(See Article: "How to setup an Aperio Door in QxControl(Hardware)")
https://www.qumulex.com/kb/how-to-setup-an-aperio-door-in-qx-control-hardware
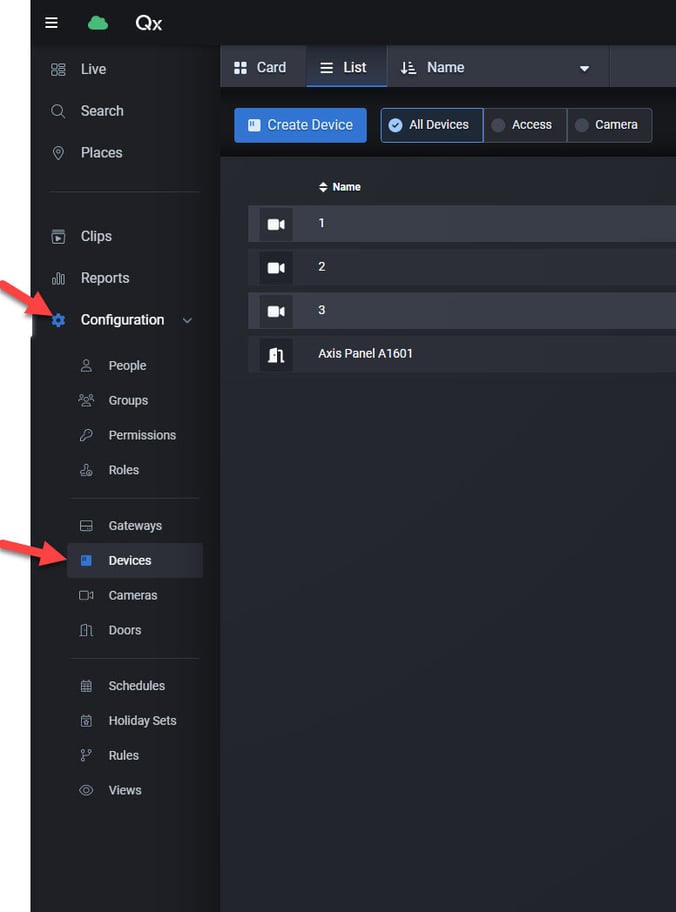
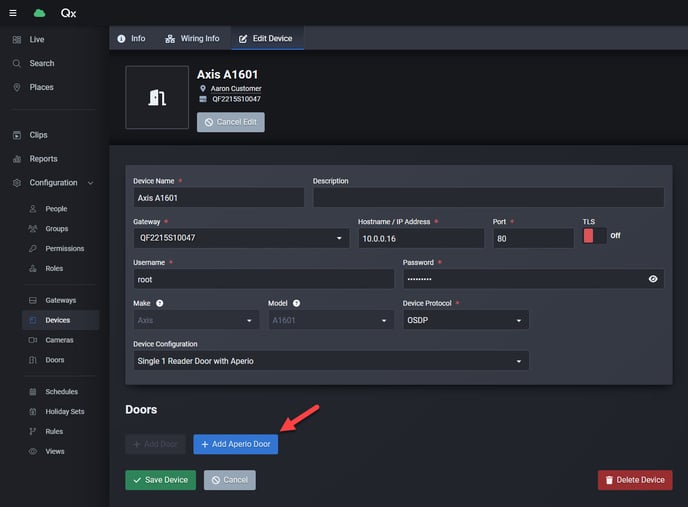
- Setting up an Aperio Door in QxControl Software starts with navigating to the Configuration Sub menu and select Devices.
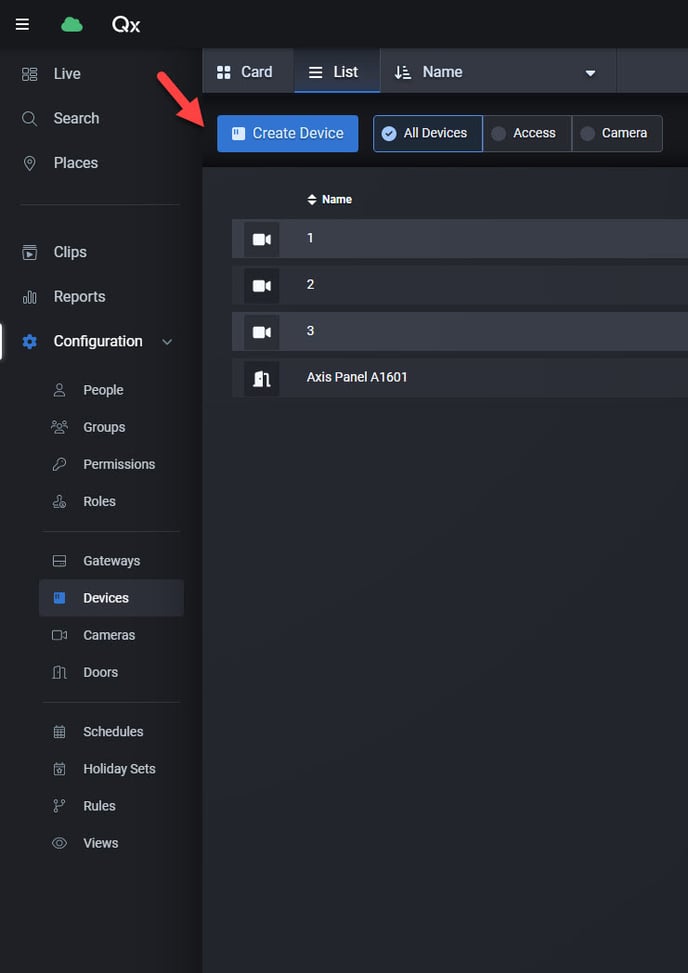
- Select Create Device at the top of the page.
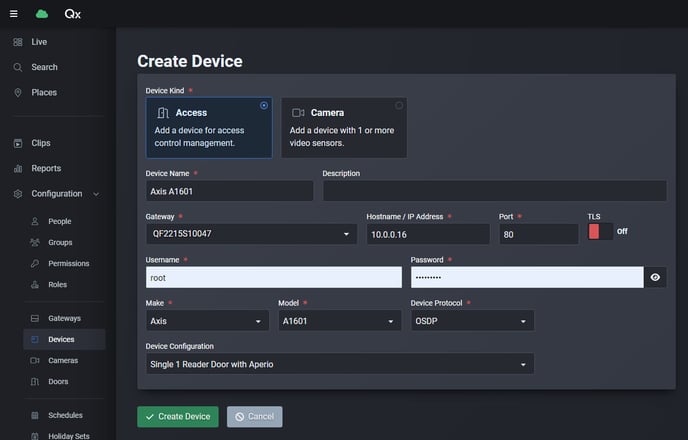
- Device kind is the first selection - Select Access
- Assign a name to this device under 'Device Name' Ex. Axis Panel A1601
- If multiple Gateways are present on the network the Gateway drop down will provide multiple options for your scoped site for you to choose from, otherwise it defaults to the single gateway configured for that scope.
- Provide the IP address for the Axis Controller, if using another port other than the default port 80, please enter that here as well.
- For the Username and Passwords field, the Username can be root or can be user defined. The user profile will need administrator access to push panel configurations.
- The Make and Model drop downs will be dependent on the hardware used. (By selecting the Axis - A1601 an additional menu for Device Configuration is exposed.
- If using the AH30 8:1 Aperio hub the Device Protocol to select will be OSDP, if also using a reader on reader port one for a directly connected door this drop down can be switched to Wiegand, for example of using a Wiegand reader. Either config will still work for the Aperio Integration.
- For Device configuration select 'Single 1 Reader Door with Aperio'
- Click Create Device
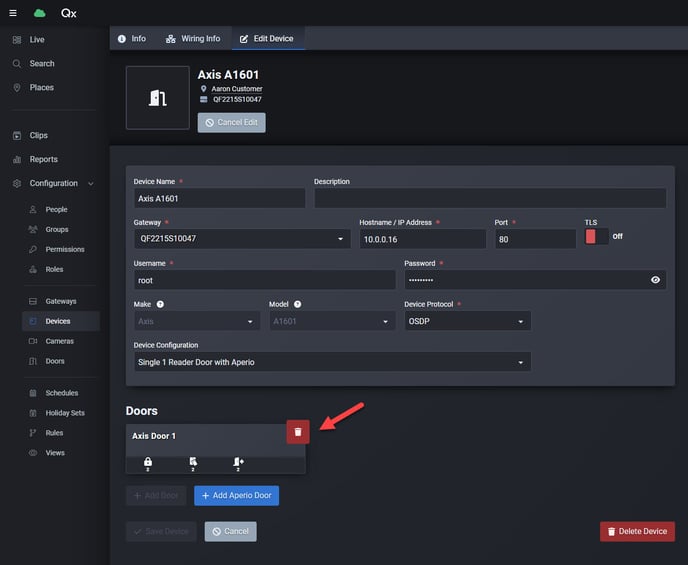
- Once Saved, the Edit Device page is automatically opened for the newly created Axis Device.
- By Default, once the A1601 is created, it creates a standard door for Reader Port 1. If using a directly connected door in addition to the Aperio Hub this template can be used to program the door properties, otherwise delete this template and setup a wireless endpoint. Click the Red Trash can need to the Door heading at the bottom of the screen.
- Click on the 'Add Aperio Door' Button
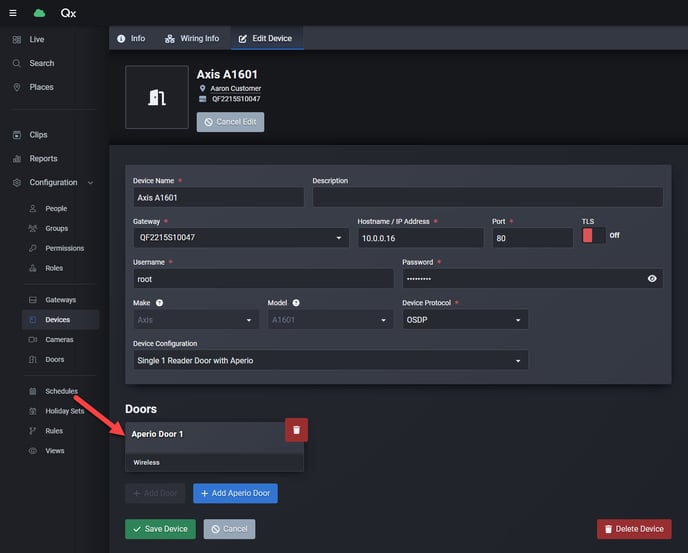
- The 'Aperio Door 1' is now built.
- Click on the 'Aperio Door 1' Heading
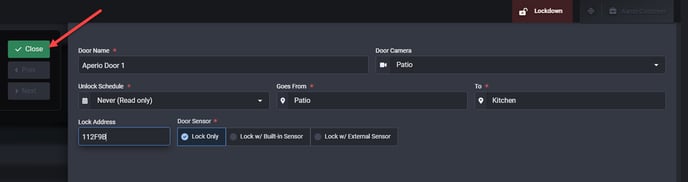
- Populate the user defined Door Name
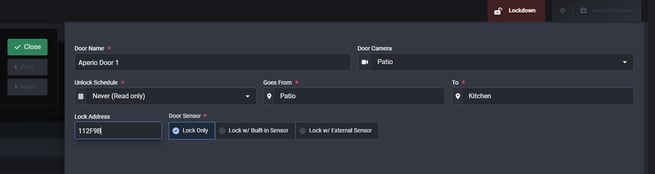
- (Optional) add a camera, select one of the cameras from the dropdown to incorporate an integrated door control button on top of a live video feed for the selected camera. Pictured below.
- Set an Unlock Schedule - User Defined unlock schedules would be present on this drop down. If no schedules have been created yet, please see the "Creating Schedules" Knowledge base Article.
- Set the 'Goes From' Area and the 'To' Area. Typically 'Goes from' is the area on the secure side of the door, and the 'To' area is the area that users will be entering once the cardholder is granted access and walks through the door.
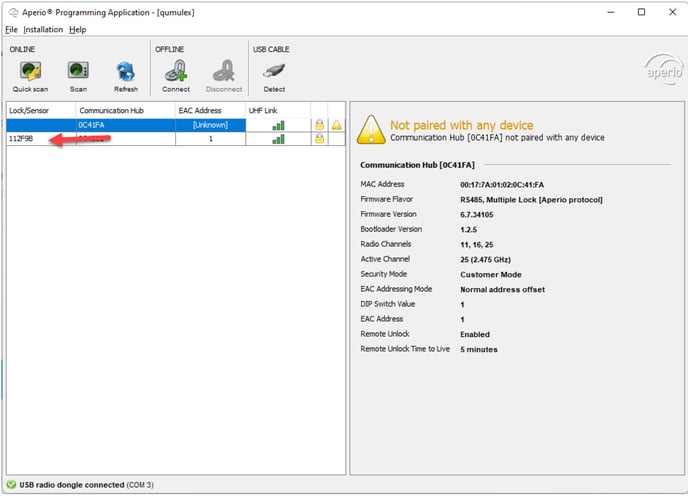
- Assign the lock address. This information can be found in the Assa Abloy Aperio Programming Application. The information needed is under the Lock / Sensor heading for this door. For more information on Lock paring and Hub / Panel wiring, please see the "Aperio Wiring with Axis A1601 & A1001" Knowledge base Article.
- Once all the fields have been completed click close on the left hand side.
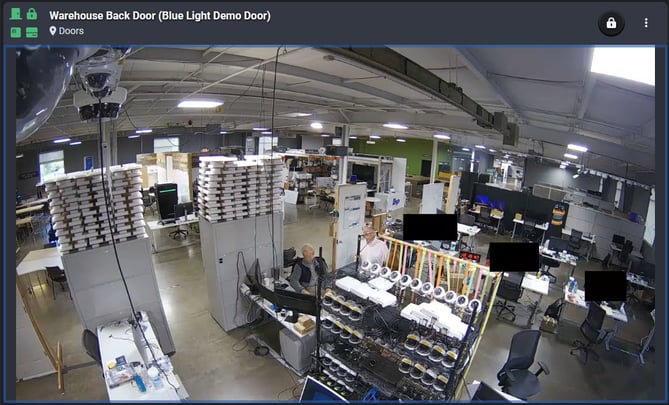
- Navigate back to the Door Page, and from here you will now see the newly created Aperio Door. To ensure its operating normally check the status icons. The desired result is all icons green as pictured below.
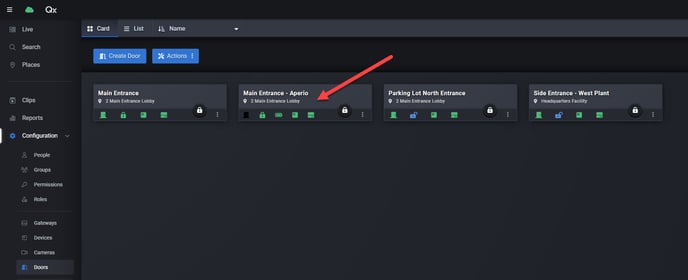
- If your door status were to look something like the image below,

please review the steps above, and ensure the lock and hub are properly commissioned in the Aperio Programming Application. Another alternative is to reach out to our support team for further assistance.
Support email:
support@qumulex.comSupport phone:
+1-317-207-0520, Opt. 4
Mercury Installs:
From the Device Menu, Edit the Mercury Controller ex. LP1501, Lp1502.
Click Add Inventory:
Select the Aperio AH40 Hub

From the Aperio AH40 Hub Card, Enter in the used IP address for the Hub and Port number.

Click - Save Device. The above steps for commissioning a device are the same in the Aperio Interface.
