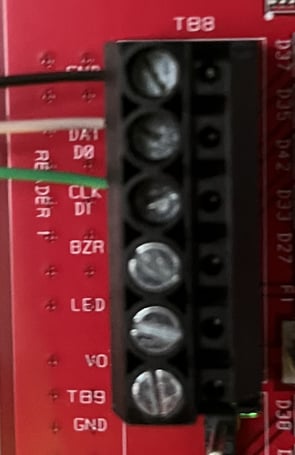
Physical Connections will need to be made at the device and Mercury Panel. Starting at the Mercury Controller, wire the GND, DAT D0, CLK D1 to the corresponding reader interface.
Wire the SAFR SC200 WIEG Out connections as follows. DAT D0 Pin 3, DAT D1 Pin 4, GND Pin 5.
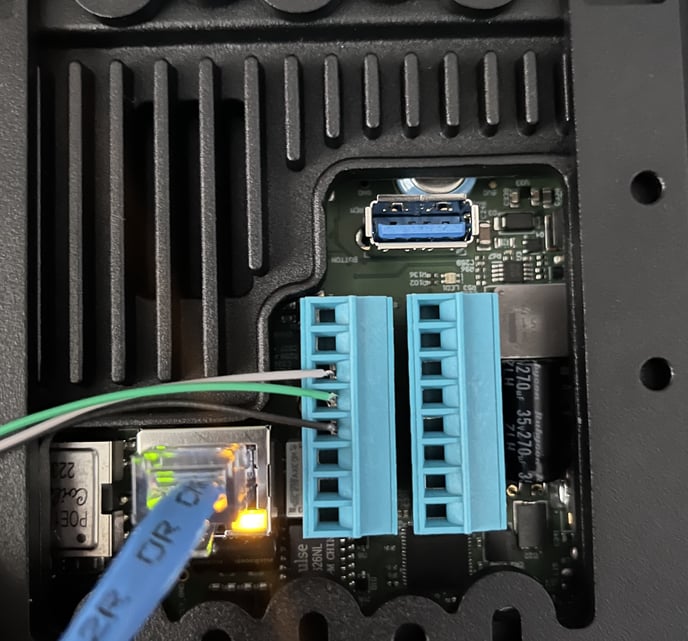
The other connection shown is the POE+ Ethernet connection, and is responsible for powering the device.
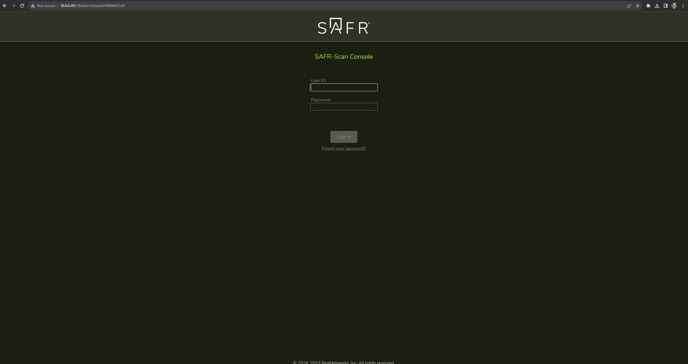
Once the device is powered up, the IP address of the device will be displayed on the screen as the device boots.
Open a web browser and navigate to the device IP.
Click 'Setup System Login' when prompted and complete the form. Then log in.
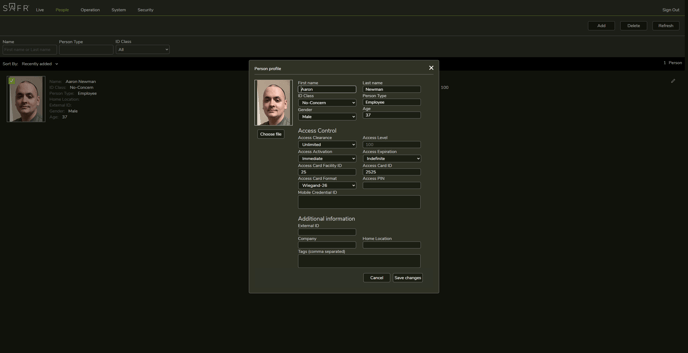
Once logged in, navigate to the People Page.
Click 'add' in the upper right hand corner.
Fill out the users Biometric as well as Access Control information, and associate an image by clicking the 'Choose File' button and uploaded a portrait.
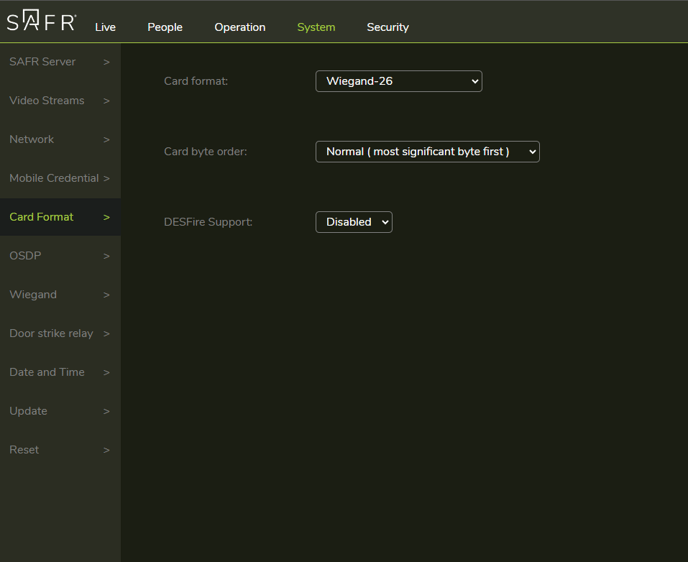
Qumulex supports multiple card formats, however in this example I have selected Wiegand 26 bit.
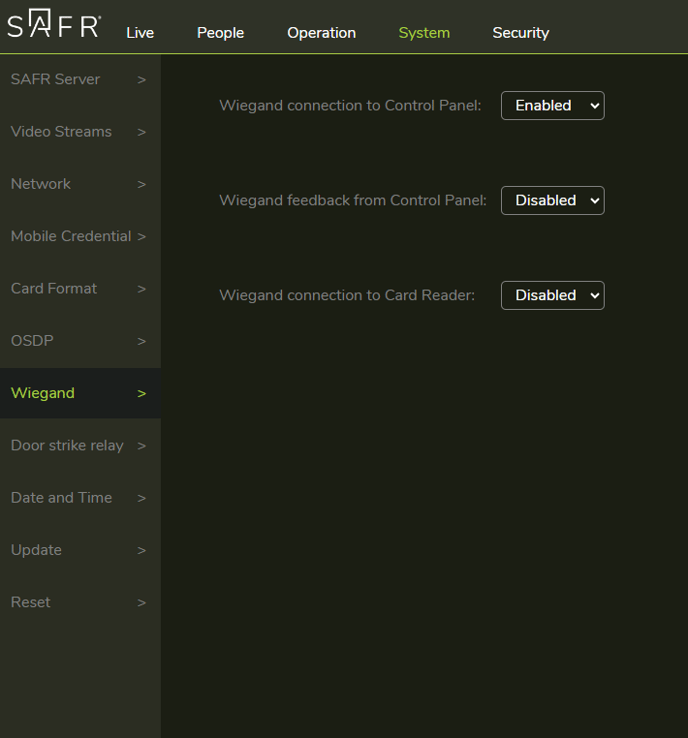
Set the following settings under the Wiegand menu to enable the outbound Wiegand connection to the Access Control Panel.
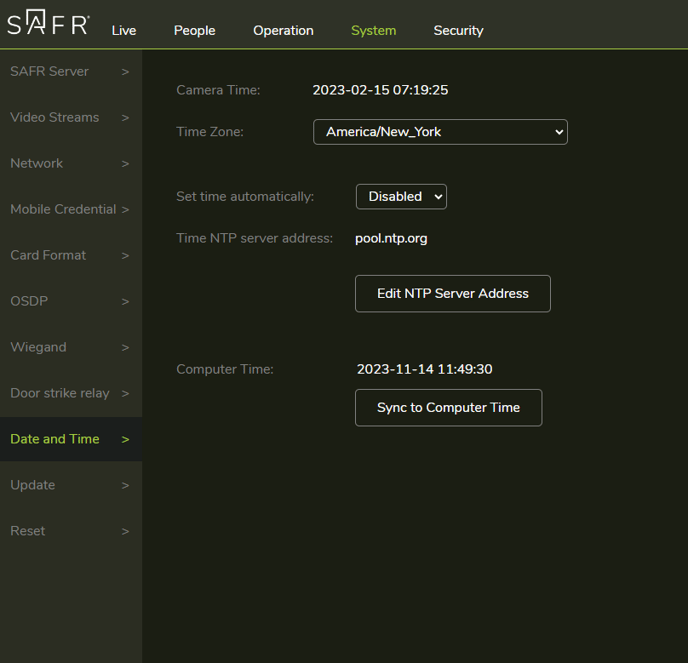
Ensure accurate time is set for proper operation, Sync to Computer Time is sufficient if no NTP server is present on the network.
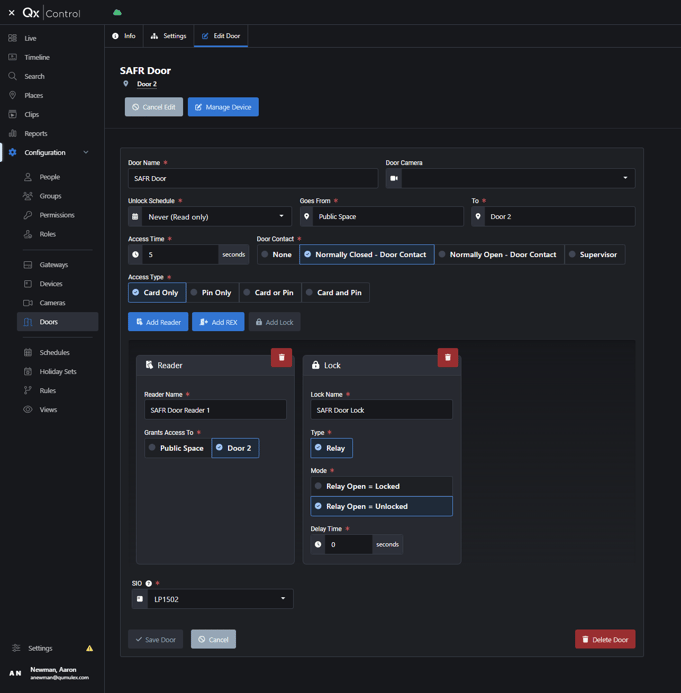
Within QX Control, we would build the door out according to requirements, and the SAFR reader would we wired to the associated reader port.